Thursday, December 22, 2016

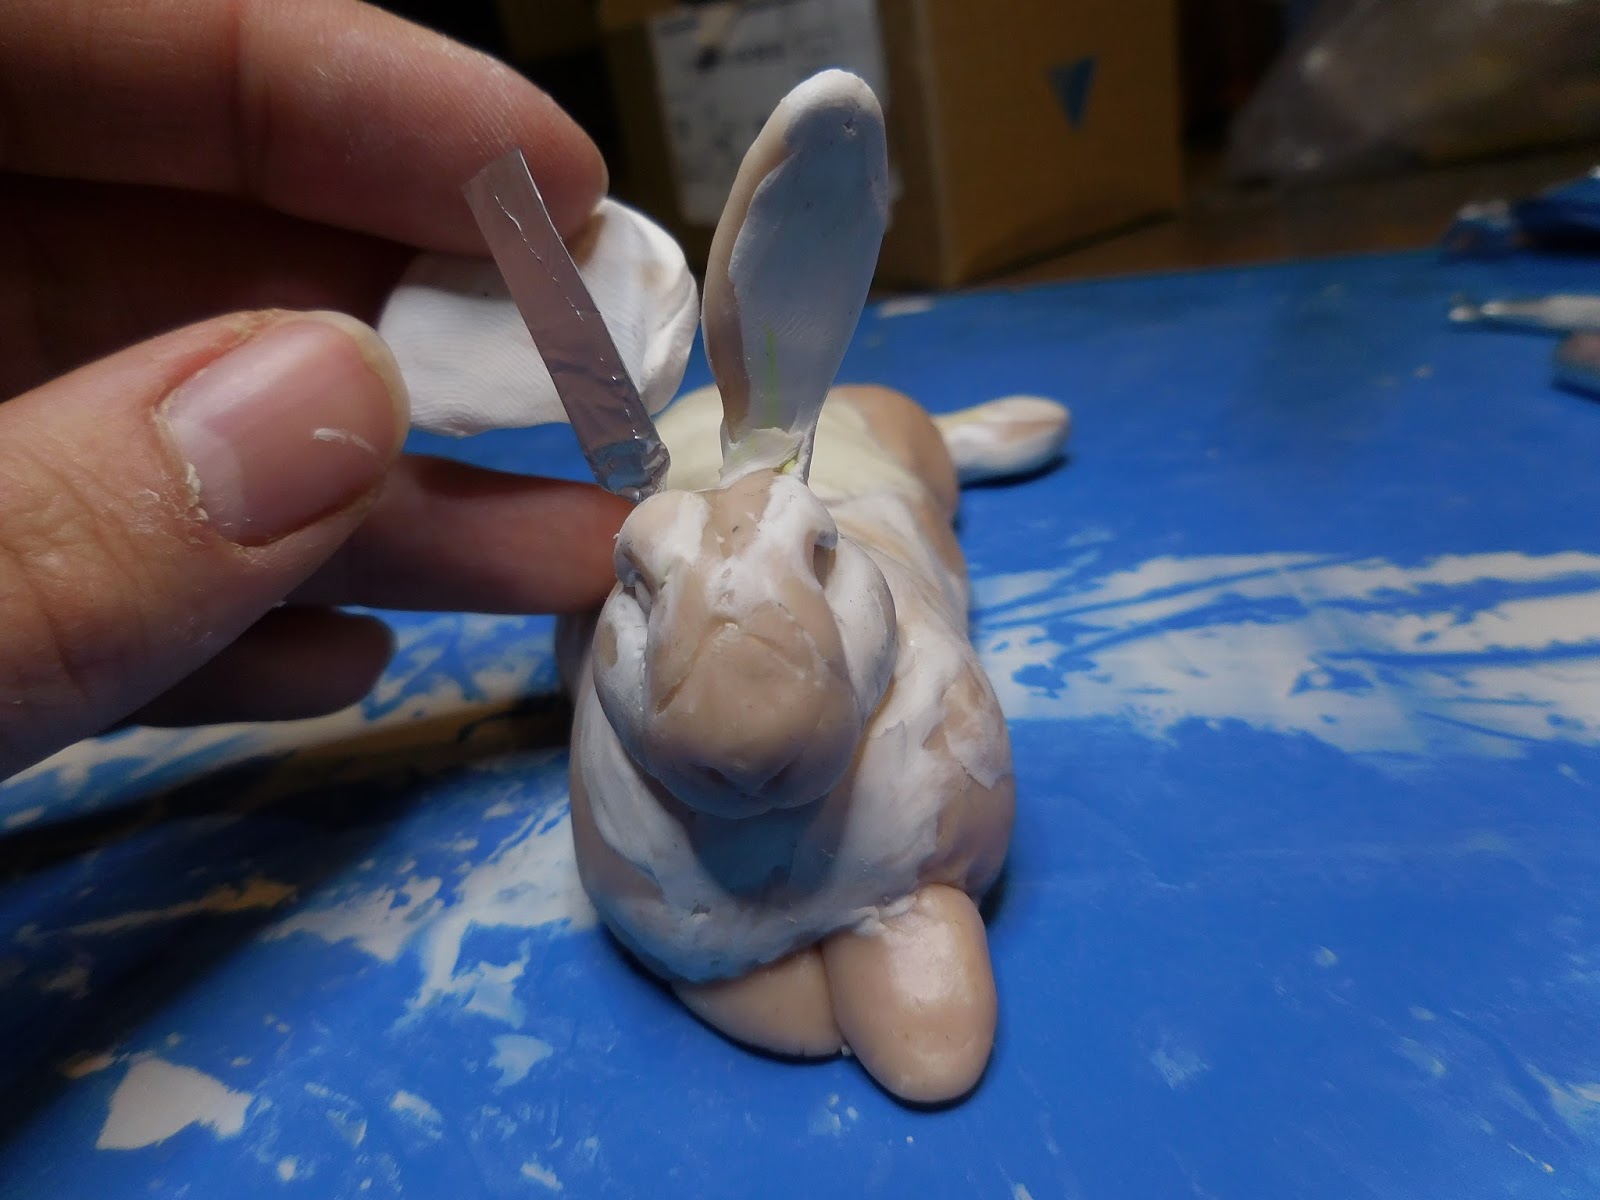
Latest Sculpture in Progress


My two-part sculpture is progressing slowly, mostly because I scratched my cornea yesterday, making closeup work (well ANYTHING, really) quite painful.

It should heal quickly, but the holidays are upon us, and that will slow me down as well.

But I am almost done with it!


The first part, the Flemish Giant, is all sculpted.

He looks like a bloody mess, since the beige clay turns red for longer bake times.


But you'll never know under all of that paint. :)

I began work on his English Lop pal. The plan was to bake two separate pieces that could interlock.


I've never attempted anything like this before, but was eager to make it work.


I rolled and baked more eyes using the beige clay, since that's all I had, and I have to say I think I may continue to use that color.


They stand out really well against the white clay and make it easier to make them symmetrical. 


For the baking part, I decided to make a foil saddle for the Flemish.


The ears will be the largest feature of the piece, so I'll be baking and sculpting them separately, probably in different stages.

I noticed how uneven the face was after this and fixed it.


And this is where I left off today. So close!


Sunday, December 18, 2016

Sculpting in Real Life

Here is my latest completed piece, a Blue-Banded Dwarf Hotot:


This was a bit of a rush order, but luckily it was the husband's weekend off! 

Somebody saw one of my rabbit figurines on another page and asked if I could sculpt one for their fundraiser auction to get a new color variety recognized in the breed.

Regular Hotots have black bands and dark brown eyes, but the blues have a slate blue coloration.


I was happy to oblige, and this guy will be off to Michigan first thing Monday morning!

So now it's back to my regular commissions list...


Which is steadily growing, I might add. Making good progress on this guy, and if the day goes well I will get him baked.


Once he's baked I'll begin work on his English Lop friend, and decide exactly how I want him arranged over him.


Forgive the swirly effect - I'm still mixing my scraps while I wait on my next clay shipment.

Once this sculpture is finished I will only have ONE rabbit left in this order. I'll be happy if I can complete it before the end of the year, but I know the holidays will slow me down.

This kind of slows me down too.....


Luckily he's pretty good about not messing with my pieces. He mostly just wants to help.

And oh my GOD look at my kitchen table!! 😨

We're still unpacking and most of our rooms are filled to the ceiling with boxes (and snakes - yes, I said snakes). Eventually I'll have my own work table in another room, but for now our 8-ft kitchen table is covered in Etsy stuff (not to mention pushed against the wall to make room for building our hearth).

It can be a little frustrating trying to work among so many distractions, but somehow it gets done.


You know, real life and all. 😊

Friday, December 16, 2016

Works in Progress

My latest finished pet portrait "Lady Bun."


The next one in the series will be two in one:


The second rabbit will be draped over this one's shoulders, something like this:


I've also been working on a rush order for a blue banded Dwarf Hotot.


This one will be auctioned for a fundraiser at the beginning of the year.

My waiting list for rabbits continues to grow, but I do have one turtle pendant on there.

I'm getting a little faster, and my son is getting older and more independent, so hopefully I can keep up a good pace.

Tuesday, December 13, 2016

Still Here!

We've been incredibly busy renovating and moving the last few months that I've hardly had time to sculpt, much less write a blog post, so I apologize.

Luckily life has settled down somewhat, so I've been able to pick up where I left off.

I'm still wading through my commissions list, and it's been great seeing the portraits come to life...


As you can see, I'm still in rabbit land, and will probably be there for some time.


I don't mind. The rabbit figurines seem to be a little niche market, and I'm getting plenty of practice!


It's been an insanely busy year, and I'm happy to be (semi)-settled in our new home and getting my hands on some clay again. Hopefully I can continue my momentum this winter! 


Saturday, June 25, 2016

Broken Chestnut Agouti Paint Job


Agouti is one of the most challenging animal colors to translate in paint because of its complexity.

In some species of animals it is known as "wild type" color, and in rabbits it is usually called chestnut or chestnut agouti.

It comes in varying shades, from light to dark, some more reddish or even yellowish in appearance.

When you look at an agouti rabbit, your eye picks up a mix of colors.


.... on the surface you usually see a combination of black, brown and wheaten colors, but it doesn't stop there....


If you blow into the coat, you can see that each individual hair is multi-colored, which is what lends such complexity to their coloration.


If you were to paint this coat onto a canvas, you would layer individual brushstrokes of different colors to get the agouti effect.

For a three dimensional sculpture, I had to use a different approach.

I texture the animals' coats using a pin, and this really helps with layering colors when it comes time to paint.


I've found that interpreting the coat colors literally doesn't work too well.

By that, I mean that when you look at the hair shaft, the colors go from black to wheaten to brown to white. Even though this influences what our eyes see on the animal, we don't see all of the colors expressed on the surface.

I decided I was over-thinking it, so what I do now is squint and blur the image. This helps you pinpoint the prevailing colors on the animal.


When I squint at Digger, here, the underlying color is a reddish brown, with sections of black and lighter highlights.

I've found that starting with the medium tone works best.


When the first layer went on, it dried far too dark, so I went over it again and was happier with the color.


I then added some black shading in a few areas, especially where there are breaks or openings in the coat.

To finish, I used a dry brush to paint a wheaten color over the fur tips, and little bit of white highlights in some areas.


My interpretation of this color into my pieces is still evolving, so I wouldn't say I've mastered it yet, but I think I'm getting closer to cracking the code! :) 


Thanks for joining me, and as always,

HAPPY SCULPTING!


Thursday, June 23, 2016

Wolf Sculpture Process


I am a HUGE nature geek. I am fascinated by animals of all shapes and sizes, but the wolf holds a special place in my heart.

So I just had to sculpt one. 

This was my first attempt, and I think it turned out pretty good, but I would like to try again with my added experience and a different approach to technique.

Here's how I went about it....


As always, I recommend Premo!  The photos are pretty self-explanatory, but I started with the head. 


I continued to layer clay and fill it out to make it the right shape (I used a ton of photo references).


Once it looked about right, I etched in a few basic details and baked to preserve my work.

 I then got to work on the rest of the body.


I began adding the body, and created the legs using aluminum foil.


As always, my clay gets extra filthy. I guess it doesn't really matter since I paint my pieces, but I do find it distracting. I may need to switch to gray so I don't notice it as much.


I skipped a few steps in pictures, but here is where I began work on the fur.

I experimented with different techniques until I finally settled on this. I wasn't 100% happy with it to be honest, but it looked alright.


I wet the fresh clay down with liquid sculpey and carved out the shapes with a curved sculpting tool.


The fur was a little to woolly and blocky for my taste, but I think it looked okay once the paint was on.

I decided to go with a less obvious choice for color. Silver and black makes for such a stunning mysterious color in a wolf, so that's what I went with.


Finished! (Photos by my husband, Mark.)


Posing with our German Shepherd Tala (her name is Sioux for "wolf").
Despite its shortcomings, I was proud of this piece for a first attempt. 

It sold within a week on Etsy and is now somewhere in Colorado, so I guess somebody thought it worthy! :) 

I'm eager to try another one when I get some time. Thanks for looking!

If you wish to keep track of my work or inquire about commissions, be sure to follow me on Facebook, Etsy or DeviantArt.

HAPPY SCULPTING!