Saturday, June 25, 2016

Broken Chestnut Agouti Paint Job


Agouti is one of the most challenging animal colors to translate in paint because of its complexity.

In some species of animals it is known as "wild type" color, and in rabbits it is usually called chestnut or chestnut agouti.

It comes in varying shades, from light to dark, some more reddish or even yellowish in appearance.

When you look at an agouti rabbit, your eye picks up a mix of colors.


.... on the surface you usually see a combination of black, brown and wheaten colors, but it doesn't stop there....


If you blow into the coat, you can see that each individual hair is multi-colored, which is what lends such complexity to their coloration.


If you were to paint this coat onto a canvas, you would layer individual brushstrokes of different colors to get the agouti effect.

For a three dimensional sculpture, I had to use a different approach.

I texture the animals' coats using a pin, and this really helps with layering colors when it comes time to paint.


I've found that interpreting the coat colors literally doesn't work too well.

By that, I mean that when you look at the hair shaft, the colors go from black to wheaten to brown to white. Even though this influences what our eyes see on the animal, we don't see all of the colors expressed on the surface.

I decided I was over-thinking it, so what I do now is squint and blur the image. This helps you pinpoint the prevailing colors on the animal.


When I squint at Digger, here, the underlying color is a reddish brown, with sections of black and lighter highlights.

I've found that starting with the medium tone works best.


When the first layer went on, it dried far too dark, so I went over it again and was happier with the color.


I then added some black shading in a few areas, especially where there are breaks or openings in the coat.

To finish, I used a dry brush to paint a wheaten color over the fur tips, and little bit of white highlights in some areas.


My interpretation of this color into my pieces is still evolving, so I wouldn't say I've mastered it yet, but I think I'm getting closer to cracking the code! :) 


Thanks for joining me, and as always,

HAPPY SCULPTING!


Thursday, June 23, 2016

Wolf Sculpture Process


I am a HUGE nature geek. I am fascinated by animals of all shapes and sizes, but the wolf holds a special place in my heart.

So I just had to sculpt one. 

This was my first attempt, and I think it turned out pretty good, but I would like to try again with my added experience and a different approach to technique.

Here's how I went about it....


As always, I recommend Premo!  The photos are pretty self-explanatory, but I started with the head. 


I continued to layer clay and fill it out to make it the right shape (I used a ton of photo references).


Once it looked about right, I etched in a few basic details and baked to preserve my work.

 I then got to work on the rest of the body.


I began adding the body, and created the legs using aluminum foil.


As always, my clay gets extra filthy. I guess it doesn't really matter since I paint my pieces, but I do find it distracting. I may need to switch to gray so I don't notice it as much.


I skipped a few steps in pictures, but here is where I began work on the fur.

I experimented with different techniques until I finally settled on this. I wasn't 100% happy with it to be honest, but it looked alright.


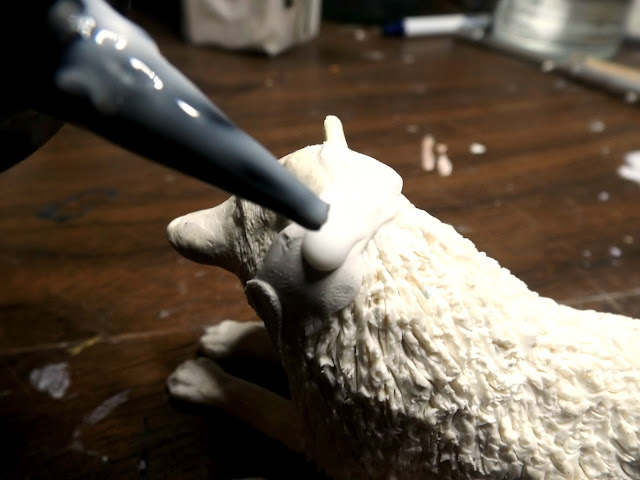
I wet the fresh clay down with liquid sculpey and carved out the shapes with a curved sculpting tool.


The fur was a little to woolly and blocky for my taste, but I think it looked okay once the paint was on.

I decided to go with a less obvious choice for color. Silver and black makes for such a stunning mysterious color in a wolf, so that's what I went with.


Finished! (Photos by my husband, Mark.)


Posing with our German Shepherd Tala (her name is Sioux for "wolf").
Despite its shortcomings, I was proud of this piece for a first attempt. 

It sold within a week on Etsy and is now somewhere in Colorado, so I guess somebody thought it worthy! :) 

I'm eager to try another one when I get some time. Thanks for looking!

If you wish to keep track of my work or inquire about commissions, be sure to follow me on Facebook, Etsy or DeviantArt.

HAPPY SCULPTING!


Making Progress


I've really been trying to make some headway on my long list of commissions.

One if my goals this year was to work faster while still maintaining quality.

Like anything else, it just comes with practice.

It isn't easy with a very busy 2 1/2-year-old and other life demands, but somehow I'm making it work.

My biggest order so far this year is a collection of 12 custom rabbit figurines.

I'm excited to be halfway through! It has been such a rewarding project, and an even better learning experience!


I have a further backlog of commissions I haven't been able to get around to for awhile, but am slowly working my way through those as well.


I really took on more than I was ready for at the beginning, but my skills are beginning to catch up with demand.

Even though I am at such a demanding transition in my life (new-ish mother, small farm, house renovation, but move coming up later this year, etc.....), I really enjoy the diversion. 

It's been such a long time since I've allowed my creative side to take flight, and I like where it is going!


Tuesday, June 21, 2016

Dragon Sculpture Process


This was my first attempt at a dragon sculpture, after a lifetime of drawing them.

I mostly wanted to experiment with the hair laying technique, but this guy continued to evolve as my imagination took hold.

I began with a foil armature layered with Premo.


I wasn't even thinking dragon at this point. Just messing around with whimsical animal shapes.


I was going for something more canine at first, so I added dog-like ears, paws and began laying a big, bushy tail.


I began experimenting with different textures, but nothing really seemed to work. It took a long time to create all of this hair, but I scrapped it just the same.


I tried some scales, and hated that even more.

After this point, I was a little stuck. He actually sat on my shelf for a couple of months as I worked on other things.


I finally returned to the project with a fresh perspective and some new ideas.


I began by laying hair along the back and adding hair to the ears.


I then gave him brows, nostrils, chest hair and a beard.


The underbelly scales were little ropes of clay attached and smoothed.

I gave him whiskers, and started adding scale texture to his body using the ball stylus.


I baked it at frequent intervals so I wouldn't mess up my progress.


The final details were the claws and fur lining the backs of the legs.


Time for paint! 

I was originally envisioning a color palette with pearlescent, muted earth tones.

But in the end, I went more bold.


I painted the fur gold,  and layered green and blue over the scales.

A little varnish, and all done!


All dragons need a name, so I dubbed him The River Guardian.


He isn't perfect, but I had so much fun with this piece, and I can't wait to make another one!

The River Guardian is still available for purchase in my Etsy Shop.

HAPPY SCULPTING!

Shared on: Wordless Wednesday